Chickpeas are a staple in our house. We always have them on hand to fill out a curry, whip into hummus, tuck into pita pockets, throw into a salad, and even sneak into dessert. Being a powerhouse of fibre, super cheap and versatile enough to use in almost any dish, we ensure that our freezer is packed with chickpeas ready to grab. While we prefer to not use cans (more for the rubbish garbage reason than the BPA one), canned chickpeas are no less nutritious than dried and are a lot more convenient. But cooking dried beans is no hard task – just a little time consuming. I like to run through this process on the odd weekend with a different bean/legume, cooking and freezing a whole heap at once to last us the following month or so.
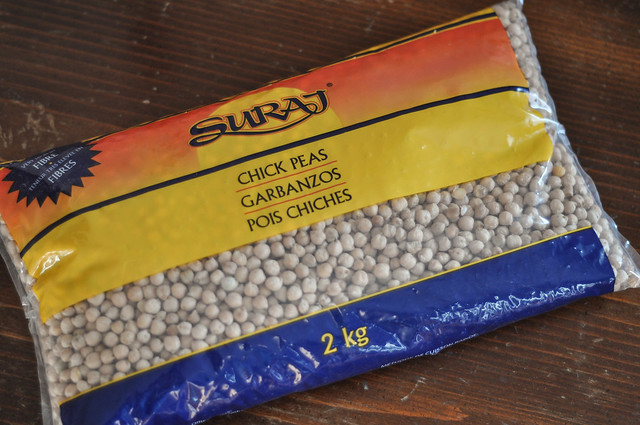
Grab yourself a bag of dried chickpeas. They can often be found in bulk bins at places like Bin Inn and Pak n Save (in New Zealand) but surprisingly are often cheaper when bought in a packaged bag. I got 2 of these huge bags from Yellowknife for $3.50 each. 2kg is a LOT of chickpeas and I don’t recommend working with this many at once. After soaking (they almost double in size) they filled 2 big pots AND my slow cooker making it a very long process of cooking them, one batch at a time! Working with 500g – 1kg is good.
1. Sort. Tip them out onto a baking bag and sort through them.Having come (almost) straight from the ground, you will likely find some deformed ones, ones with black patches, and plenty of little stones. Discard all of these. Rinse well and place in a large saucepan.
2. Soak. Fill with water to cover up to two inches above the chickpeas. Throw in a good shake of salt (some people use baking soda but plain water is fine too), place a lid on top and leave to soak for 10 – 12 hours, adding more water if you see them looking dry on top.
3. Cook. Once they have done their soaking time, tip off the water and refill with clean water. At this stage you can bring to the boil on the stove, or throw them into the slow cooker for 4 hours on high (except mine took about 6 hours!). I prefer to use the stove at you have a lot more control over the process and it’s a lot quicker, normally about 1 hour. Taste a chickpea or two after 45 minutes. It will be ready when there is little resistance to the bite. If I know I am pureeing them (such as for chocolate chunk chickpea cookie pie) I cook them until quite soft and most of the skins have floated to the surface. But for the most part it’s good to have a little firmness to the bite.
4. Drain and rinse. Tip chickpeas into a colander and run cold water over them to cool. They are now ready to be used.
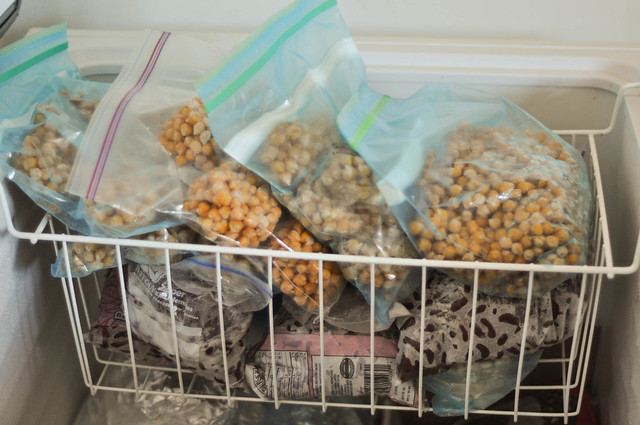
5. Freeze. Cooked chickpeas will keep in the fridge for no more than a week. (Keep some aside for upcoming Green Monster Muffin recipe!) Frozen chickpeas will keep for, well they say a month, but I find they are fine after two months.. or more.
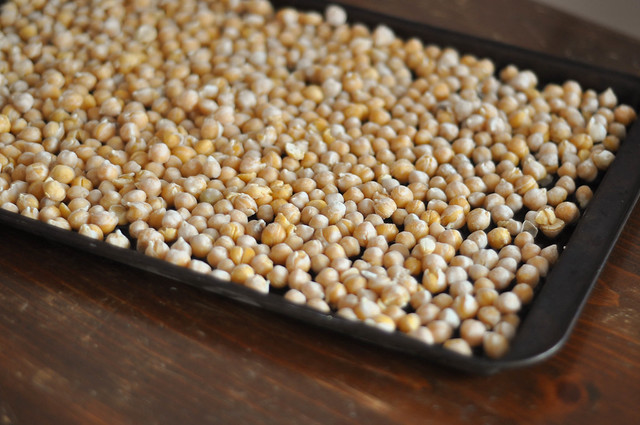
I like to freeze them either free flow, or in 3/4 cup lots. For free flow, spread chickpeas evenly over baking tray and freeze (overnight is good). Ideally the chickpeas wont be touching one another while freezing.
Once frozen separate any stuck together and transfer to a freezer bag.
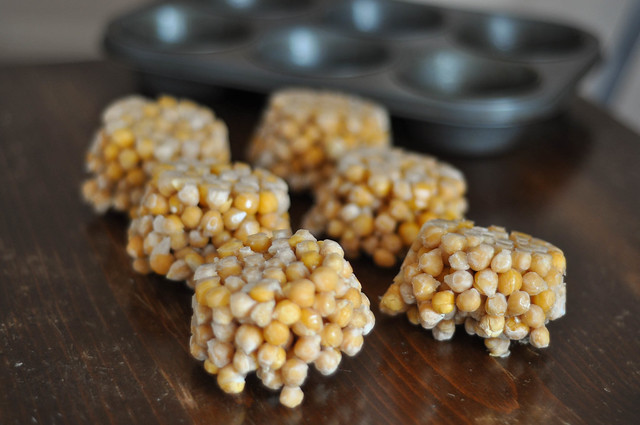
Alternatively, divide amongst muffin tin holes (whichever size you have) and place in freezer for a few hours or overnight.

Once frozen, turn muffin tin over and punch out by pressing the centre of each cup.
Throw into a freezer bag and label.
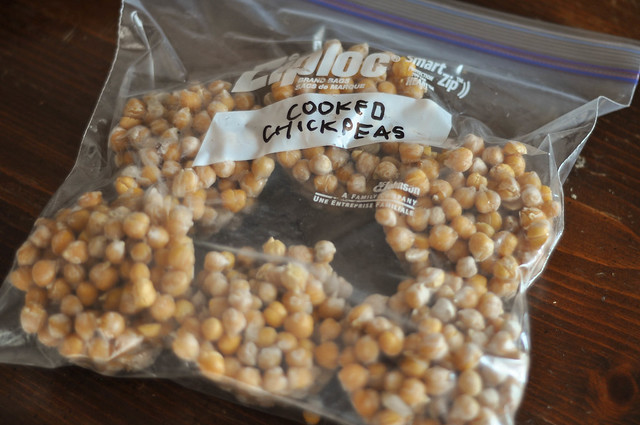
Chuck in the freezer and enjoy beans and legumes ready to go! They can be added frozen to curries/stews/soups etc, or leave to defrost a couple of hours prior to use.
Pingback: green monster muffins « De La Casa
Look at that stocked freezer!
Pingback: Frozen chickpeas – Maximum Green